Wall Putty Application Mistakes That Can Ruin Your Paint Finish
A good paint finish does not depend only on the quality of paint. It depends heavily on what goes below the paint. If the wall surface is uneven, dusty, damp, weak, or poorly prepared, even premium paint can start looking dull, patchy, or damaged after some time.
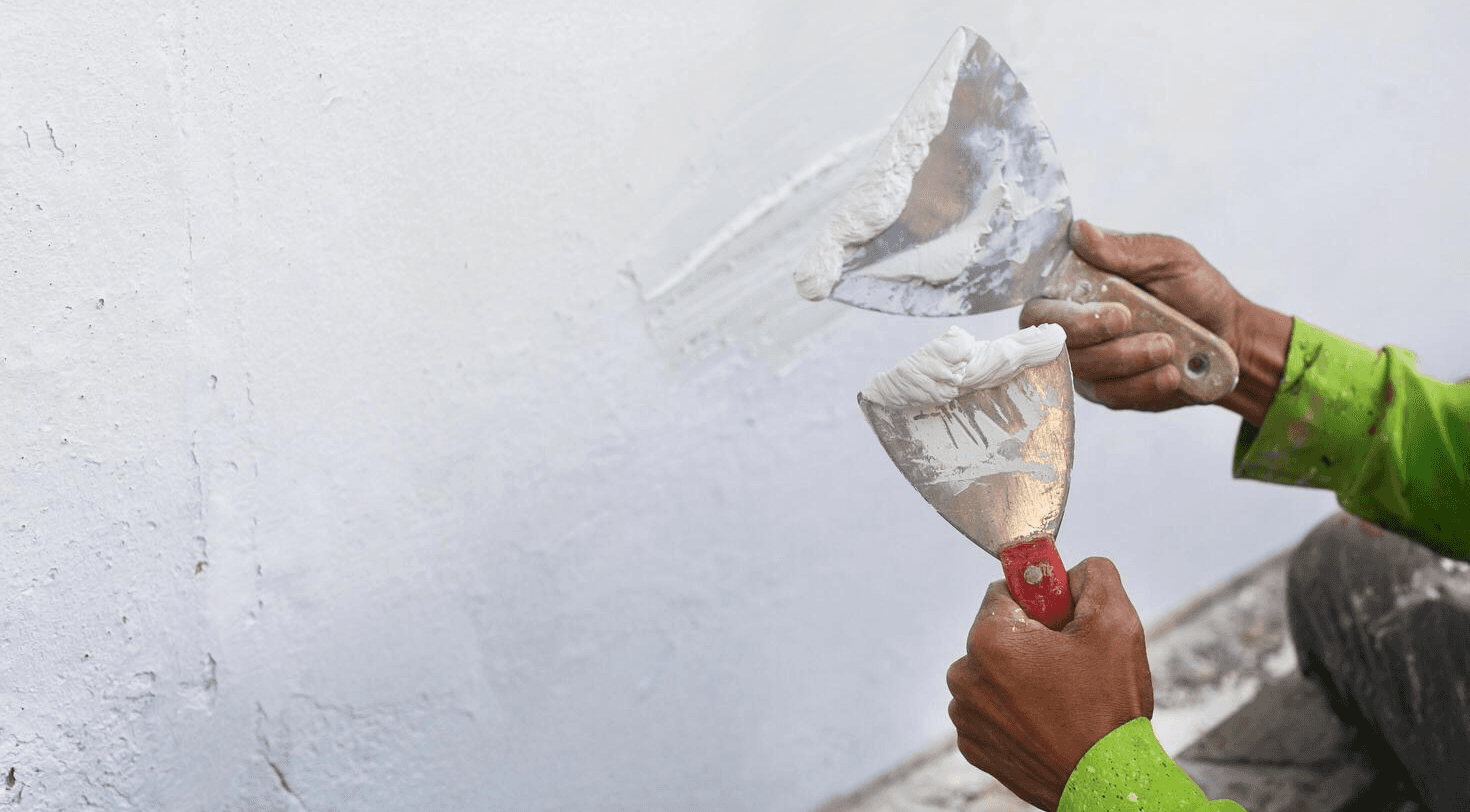
This is where wall putty plays an important role.
Wall putty helps create a smooth and even base for painting. It fills minor surface imperfections, improves the appearance of the wall, and helps paint look cleaner. But if wall putty is applied incorrectly, it can create more problems than it solves.
Many paint failures happen because of simple putty application mistakes. Let’s understand the most common mistakes that can ruin your paint finish and how to avoid them.
No h3 tags found inside Content.
1. Applying Putty on a Damp Wall
This is one of the biggest mistakes in wall finishing. Many people apply putty directly on a wall that has moisture, seepage, or damp patches. At first, the surface may look fine, but after painting, problems start appearing.
You may notice:
Paint peeling
Yellow or brown stains
Bubbling
Flaking
Fungus growth
Patchy finish
Putty cannot solve moisture problems by itself. If the wall is damp, the moisture source must be treated first.
What to do instead:
Before applying wall putty, check the wall properly. If there is seepage, leakage, or dampness, fix it before starting the finishing work. The wall should be dry, clean, and stable before putty application.
2. Not Cleaning the Surface Properly
Wall putty needs a clean surface to bond properly. If the wall has dust, loose particles, grease, old flaking paint, or cement powder, the putty may not stick well.
This can lead to poor bonding and later cause the putty or paint layer to peel off.
What to do instead:
Clean the wall thoroughly before applying putty. Remove dust, loose plaster, oil, grease, and old peeling paint. A clean surface gives better adhesion and helps the final paint finish last longer.
3. Applying Putty on Weak or Loose Plaster
Sometimes the plaster itself is weak. If powder comes off when you rub the wall with your hand, the surface is not strong enough. Applying putty on such a wall is risky because the base layer may fail later.
Even if the putty is good, it cannot perform well on a weak surface.
What to do instead:
Check the wall strength before application. Remove loose plaster and repair weak areas first. The base should be firm and sound before applying wall putty.
4. Skipping Primer Before Putty Where Required
Some surfaces may need primer or surface treatment before putty application, depending on the wall condition and product recommendation. Skipping this step can affect bonding and surface performance.
Primer helps control surface absorption and can improve adhesion in certain cases.
What to do instead:
Follow the product instructions. If the wall surface is highly porous, chalky, or uneven in absorption, use the recommended primer or surface treatment before applying putty.
5. Mixing Putty with Too Much Water
Many workers add extra water to make putty easier to spread. This may look convenient during application, but it can weaken the putty layer.
Too much water can cause poor strength, shrinkage, cracks, powdering, and weak bonding.
What to do instead:
Mix wall putty with the correct amount of clean water as recommended by the manufacturer. The mix should be smooth and lump-free, but not too thin or watery.
6. Not Mixing the Putty Properly
Poor mixing can create lumps, uneven consistency, and weak patches. If putty is not mixed properly, it becomes difficult to apply smoothly and may affect the final finish.
Lumps can also create uneven marks that become visible after painting.
What to do instead:
Add putty powder slowly into clean water while mixing. Mix until a smooth paste is formed. Let it rest for a short time if recommended, then remix before application. Always follow the product guidelines.
7. Applying a Very Thick Layer
Wall putty is meant for surface smoothing, not for filling deep gaps or correcting major wall unevenness. Applying a thick layer of putty can lead to cracks, shrinkage, poor drying, and uneven finish.
A thick putty layer may also take longer to dry and may not bond properly.
What to do instead:
Apply putty in thin and even coats. If the wall has major unevenness, repair it with suitable plaster or repair material first. Putty should be used only for final surface leveling and smoothness.
8. Not Allowing the First Coat to Dry Properly
Many people apply the second coat too quickly to save time. But if the first coat is not dry, the second coat may not bond properly. This can create patchiness, peeling, or uneven sanding.
Drying time is important for a strong and stable finish.
What to do instead:
Allow each coat of putty to dry properly before applying the next coat. Drying time can vary depending on weather, humidity, surface condition, and product type.
9. Poor Sanding After Putty Application
Sanding is important for achieving a smooth paint finish. If sanding is done poorly, the wall may look uneven after painting. If sanding is too harsh, it can damage the putty layer.
Bad sanding can create:
Scratch marks
Uneven patches
Rough texture
Visible roller marks after painting
Poor light reflection on the wall
What to do instead:
Sand the dried putty surface gently and evenly using the right sanding paper. The goal is to make the wall smooth, not to remove too much putty.
10. Painting Before the Putty Is Fully Dry
Paint should never be applied on wet or partially dry putty. If the putty still has moisture inside, the paint layer may not perform well.
This can lead to poor adhesion, patchy color, bubbling, and peeling.
What to do instead:
Make sure the putty is completely dry before applying primer or paint. Do not rush the process, especially during humid or rainy weather.
11. Ignoring Surface Leveling Before Putty
Putty can hide small imperfections, but it cannot fix badly uneven walls. If the wall has waves, deep cracks, holes, or rough plaster, putty alone will not give a perfect finish.
Trying to correct everything with putty can increase material usage and still give poor results.
What to do instead:
Repair major defects before putty application. Fill deep cracks, level uneven plaster, and correct surface defects first. Then use putty for the final smooth layer.
12. Using the Wrong Type of Putty
Different walls and conditions may need different types of putty. Interior walls, exterior walls, damp areas, and repainting surfaces may have different requirements.
Using the wrong putty can affect durability and finish quality.
What to do instead:
Choose the right putty based on the wall type and application area. For exterior walls or moisture-prone areas, use a putty suitable for those conditions. Always check product recommendations before use.
13. Applying Putty in Bad Weather Conditions
Weather plays a major role in drying and finishing. High humidity, heavy moisture, extreme heat, or poor ventilation can affect putty performance.
In humid conditions, putty may take longer to dry. In very hot conditions, it may dry too quickly from the surface and not settle properly.
What to do instead:
Apply putty in suitable weather conditions whenever possible. Ensure proper ventilation for interior walls. Avoid application during heavy dampness or when the wall has not dried properly.
14. Not Removing Old Peeling Paint Before Repainting
During repainting, many people apply putty directly over old paint. If the old paint is loose or peeling, the new putty and paint will not last.
The new finish is only as strong as the layer below it.
What to do instead:
Remove old loose paint completely. Scrape peeling areas, sand the surface, clean the dust, and repair damaged patches before applying putty.
15. Not Following the Right Application Sequence
A good paint finish needs the right step-by-step process. If the sequence is wrong, the final finish may fail.
A common proper sequence is:
Surface inspection
Leakage or dampness repair
Cleaning and scraping
Crack and defect repair
Primer or surface treatment, if required
Putty application
Drying
Sanding
Primer
Paint application
Skipping or changing steps without understanding the surface can affect the final result.
16. Using Poor Quality Tools
The quality of tools also affects the finish. Dirty tools, uneven blades, rough trowels, and poor sanding materials can leave marks on the wall.
These marks may become more visible after painting, especially under lights.
What to do instead:
Use clean and proper tools for putty application. Make sure the putty blade, trowel, sanding paper, and mixing container are clean before use.
17. Applying Putty Without Skilled Workmanship
Putty application looks simple, but achieving a smooth and even finish needs skill. Poor workmanship can result in uneven surfaces, visible patches, extra sanding, and paint defects.
This is especially important for premium paints and large wall surfaces where light reflection easily shows imperfections.
What to do instead:
Hire trained applicators who understand surface preparation, mixing, coat thickness, drying, and sanding. Good workmanship can make a big difference in the final paint finish.
Why Wall Putty Matters for Paint Finish
Wall putty acts as the base for paint. It improves smoothness, reduces surface unevenness, and helps the paint look richer and more uniform.
But putty cannot fix every wall problem. It works best when the wall is dry, strong, clean, and properly prepared.
A good putty application can help achieve:
Smoother wall finish
Better paint appearance
Reduced patchiness
Improved surface uniformity
Cleaner final look
Longer-lasting paint performance
Final Thoughts
Wall putty is an important step in achieving a beautiful paint finish, but only when it is applied correctly. Mistakes like applying putty on damp walls, using too much water, skipping surface cleaning, applying thick layers, or painting before drying can ruin the final result.
The secret to a long-lasting paint finish is not just good paint. It starts with proper wall preparation.
A smooth wall is built step by step. Treat dampness, clean the surface, repair defects, apply putty correctly, allow proper drying, sand evenly, and then paint.
When the base is right, the paint finish looks better and lasts longer.


Company
Products


" height="25.25135132999958px" id="l52hnrJqN" transform="translate(40.607 0)" width="24.79527169444519px"/><path d="M 53.009 28.832 L 56.456 38.181 L 49.556 38.181 L 53.004 28.832 Z M 47.975 42.426 L 58.008 42.426 L 59.644 46.866 L 70.571 46.866 C 68.73 41.948 61.281 27.981 72.869 31.523 C 72.869 31.523 74.569 32.135 75.869 32.374 C 77.173 32.612 78.345 32.63 79.798 32.348 C 81.252 32.065 82.586 30.98 82.586 30.98 C 82.586 30.98 81.46 30.655 80.523 30.26 C 79.585 29.865 77.599 28.971 76.858 28.576 C 76.112 28.181 73.273 26.571 73.014 26.098 C 72.754 25.625 73.09 25.451 73.09 25.451 C 73.09 25.451 73.491 25.16 74.663 26.089 C 75.839 27.018 78 28.042 78.929 28.472 C 79.858 28.901 83.05 29.991 84.631 30.121 C 86.208 30.247 87.205 30.299 89.174 29.904 C 91.139 29.509 92.187 27.66 92.187 27.66 C 88.88 26.289 80.092 22.955 77.024 21.05 C 75.575 20.147 76.704 18.876 78.302 19.731 L 79.73 20.564 C 79.73 20.564 82.394 21.983 84.959 22.999 C 87.529 24.014 90.819 24.891 92.831 25.286 C 94.843 25.681 97.898 25.82 98.964 25.698 C 100.029 25.577 101.879 25.243 103.575 24.34 C 105.275 23.437 106 21.97 106 21.97 C 105.356 21.771 103.835 21.384 102.198 20.85 C 92.047 17.547 81.601 6.506 74.386 10.842 C 57.569 20.95 59.201 16.536 53 0 C 46.799 16.532 48.431 20.946 31.614 10.842 C 24.399 6.506 13.953 17.547 3.802 20.85 C 2.161 21.384 0.644 21.771 0 21.97 C 0 21.97 0.729 23.437 2.425 24.34 C 4.121 25.243 5.971 25.577 7.036 25.698 C 8.102 25.82 11.157 25.681 13.169 25.286 C 15.181 24.891 18.475 24.014 21.041 22.999 C 23.61 21.983 26.27 20.564 26.27 20.564 L 27.698 19.731 C 29.296 18.876 30.429 20.147 28.976 21.05 C 25.908 22.955 17.12 26.289 13.813 27.66 C 13.813 27.66 14.857 29.509 16.826 29.904 C 18.795 30.303 19.788 30.251 21.369 30.121 C 22.95 29.995 26.142 28.901 27.071 28.472 C 28 28.042 30.165 27.018 31.337 26.089 C 32.513 25.16 32.91 25.451 32.91 25.451 C 32.91 25.451 33.246 25.625 32.986 26.098 C 32.722 26.571 29.884 28.181 29.142 28.576 C 28.401 28.971 26.415 29.865 25.477 30.26 C 24.54 30.655 23.414 30.98 23.414 30.98 C 23.414 30.98 24.748 32.065 26.202 32.348 C 27.655 32.63 28.831 32.617 30.131 32.374 C 31.435 32.135 33.131 31.523 33.131 31.523 C 44.715 27.986 37.27 41.952 35.424 46.866 L 46.352 46.866 L 47.988 42.43 Z" fill="rgb(3, 78, 162)" height="46.865605354309196px" id="Z0KZJ2Zdy" transform="translate(0 10.134)" width="106px"/></g></svg>)
" height="29.503355160891616px" id="wb2jx_zQ3" transform="translate(0.355 0.425)" width="68.9317761739095px"/><path d="M 25.244 13.507 C 24.83 13.191 24.123 11.976 23.213 11.916 C 21.532 11.786 19.635 12.746 18.749 14.089 C 17.626 16.129 18.843 17.446 21.452 17.016 C 22.624 16.773 25.016 15.833 25.242 13.507 Z M 0.82 12.36 C 0.82 12.36 0.821 12.36 0.821 12.359 L 0.82 12.364 Z M 1.13 8.082 C 2.362 6.277 7.016 5.669 8.706 7.091 C 10.126 8.158 11.129 9.789 10.573 12.131 L 11.306 12.224 C 11.774 12.12 12.113 11.849 12.361 11.469 L 12.467 8.764 L 11.04 8.826 L 11.133 6.871 L 37.448 6.871 L 37.401 7.755 C 39.942 6.24 42.873 5.971 45.425 6.558 C 48.914 7.746 48.624 11.611 47.091 13.758 C 45.471 15.717 43.407 16.435 40.469 16.097 C 41.101 17.387 41.993 18.438 43.145 19.447 C 44.692 20.749 46.524 21.447 48.023 20.813 L 48.431 22.133 C 45.33 22.446 42.868 21.469 40.141 18.907 C 38.927 17.755 37.826 16.451 37.045 14.735 L 39.209 13.151 C 39.772 14.442 40.117 14.687 41.32 14.829 C 43.714 14.846 45.998 12.497 45.876 9.806 C 45.653 7.575 43.314 7.058 40.742 8.217 C 39.102 9.091 38.203 10.351 37.609 11.904 L 36.493 8.758 L 27.836 8.778 L 27.641 11.687 C 30.264 9.291 33.121 9.331 34.563 11.324 C 35.957 13.253 36.198 16.3 34.32 18.342 C 32.822 20.031 29.635 20.506 28.749 18.831 L 27.991 16.693 C 27.803 15.918 28.625 15.655 29.014 16.442 C 30.14 18.069 32.479 17.429 33.529 15.853 C 34.679 13.544 33.79 11.993 31.755 12.235 C 30.149 12.406 28.053 14.204 27.417 15.871 C 27.324 17.531 26.892 19.178 27.592 20.487 C 28.129 21.391 27.739 21.846 27.041 21.577 C 25.667 20.846 24.819 19.38 24.859 17.737 C 22.373 20.007 18.493 20.104 17.165 16.366 C 16.215 13.193 17.535 10.987 20.043 10.037 C 22.327 9.235 24.23 9.906 25.289 11.526 L 25.503 8.762 L 14.789 8.767 L 14.159 19.251 C 14.113 20.362 14.818 21.158 15.708 22.058 C 14.611 21.853 13.526 21.418 12.576 20.553 C 12.031 19.986 11.78 19.144 11.955 17.9 L 12.183 13.673 C 11.351 14.022 10.628 14.009 9.999 13.409 C 8.71 15.475 5.89 16.044 3.631 15.293 L 11.364 25.018 C 13.402 27.42 15.156 28.393 17.764 28.587 C 16.844 29.233 15.934 29.589 14.91 29.486 C 12.337 29.144 10.569 27.453 9.078 25.669 C 7.277 23.473 5.494 21.271 3.75 19.057 C 2.477 17.44 1.223 15.817 0 14.186 L 2.534 12.604 C 4.236 15.338 7.944 13.555 8.473 10.638 C 8.768 8.951 8.265 7.955 6.699 7.924 C 3.353 8.016 1.841 9.849 0.821 12.359 Z M 51.408 16.642 C 52.914 16.673 54 16.453 54.401 15.693 C 54.77 14.911 54.21 13.673 53.617 13.427 C 52.662 13.087 50.874 13.64 50.263 14.746 C 49.86 15.607 50.006 16.531 51.408 16.642 Z M 64.42 6.853 C 63.656 4.577 61.744 2.12 59.535 1.927 C 58.111 1.789 56.709 3.104 56.341 4.311 C 56.053 5.471 56.826 6.286 57.695 6.853 Z M 48.659 6.858 L 54.826 6.858 C 53.078 4.869 54.111 1.36 57.708 0.193 C 61.746 -0.96 64.601 3.284 65.88 6.833 L 68.932 6.864 L 68.813 8.767 L 66.283 8.76 L 65.652 18.578 C 65.454 20.113 66.079 21.16 67.247 21.875 C 65.268 21.875 63.425 21.395 63.425 18.795 L 64.03 8.755 L 60.617 8.764 L 59.941 18.927 C 59.897 20.104 60.636 21.049 61.558 21.789 C 59.668 21.364 57.757 20.686 57.732 18.875 L 58.08 12.686 C 57.249 13.169 56.339 13.413 55.409 13.307 C 57.074 16.167 55.889 18.566 53.036 18.884 C 49.1 19.149 47.766 14.778 49.736 12.655 C 50.859 11.518 52.163 11.111 53.783 11.155 C 55.388 11.155 57.214 10.929 58.246 10.311 L 58.352 8.747 L 48.568 8.787 L 48.657 6.856 Z" fill="rgb(235, 110, 3)" height="29.50335516089161px" id="DDLAVrKQd" width="68.93177235921223px"/><path d="M 1.271 1.371 L 1.706 1.371 C 1.803 1.371 1.876 1.353 1.925 1.315 C 1.974 1.278 1.998 1.222 1.998 1.147 C 1.998 1.073 1.974 1.018 1.929 0.98 C 1.883 0.944 1.814 0.924 1.721 0.924 L 1.271 0.924 Z M 0.895 2.318 L 0.895 0.635 L 1.803 0.635 C 1.974 0.635 2.113 0.678 2.217 0.764 C 2.322 0.849 2.373 0.962 2.373 1.104 C 2.373 1.265 2.315 1.384 2.198 1.458 C 2.167 1.478 2.133 1.495 2.093 1.509 C 2.115 1.516 2.135 1.527 2.153 1.536 C 2.255 1.593 2.31 1.691 2.313 1.825 L 2.322 2.102 C 2.322 2.156 2.33 2.196 2.341 2.218 C 2.352 2.242 2.372 2.26 2.401 2.273 L 2.401 2.318 L 1.985 2.318 C 1.976 2.3 1.967 2.264 1.96 2.205 C 1.952 2.147 1.949 2.085 1.947 2.02 L 1.947 1.864 C 1.943 1.787 1.92 1.735 1.872 1.702 C 1.827 1.669 1.75 1.655 1.642 1.655 L 1.267 1.655 L 1.267 2.32 L 0.891 2.32 Z M 1.59 0 C 2.465 0 3.179 0.667 3.179 1.487 C 3.179 2.307 2.465 2.975 1.59 2.975 C 0.715 2.975 0 2.307 0 1.487 C 0 0.667 0.715 0 1.59 0 Z M 0.248 1.487 C 0.248 2.178 0.849 2.742 1.59 2.742 C 2.33 2.742 2.931 2.178 2.931 1.487 C 2.931 0.796 2.328 0.233 1.59 0.233 C 0.849 0.233 0.248 0.796 0.248 1.487 Z" fill="rgb(35, 31, 32)" height="2.9745454762198698px" id="OUWSzelqg" transform="translate(66.866 3.067)" width="3.179166666666447px"/></g></svg>)
